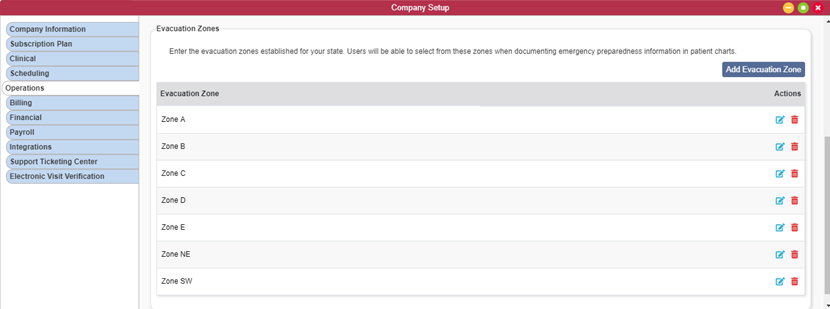
Axxess Home Health now enables users to add, edit and delete evacuation zones in Company Setup. Once evacuation zones are entered in Company Setup, users can select from the identified zones when documenting patients’ emergency preparedness information in the system.
By enabling users to identify evacuation zones established for their states, and populating the identified zones to patient documents, this functionality facilitates seamless emergency planning, so organizations are well-equipped to operate in the event of an emergency.
This feature also helps organizations demonstrate appropriate emergency preparedness measures to stay compliant and deliver appropriate care with optimal safety precautions.
To add evacuation zones, navigate to Company Setup under the Admin tab. On the Operations tab, navigate to the Evacuation Zones section and click Add Evacuation Zone.
Admin tab ➜ Company Setup ➜ Operations tab ➜ Evacuation Zones ➜ Add Evacuation Zone

Enter the evacuation zone name and click Add.

To edit or delete an existing evacuation zone, click the edit or delete icon under Actions.
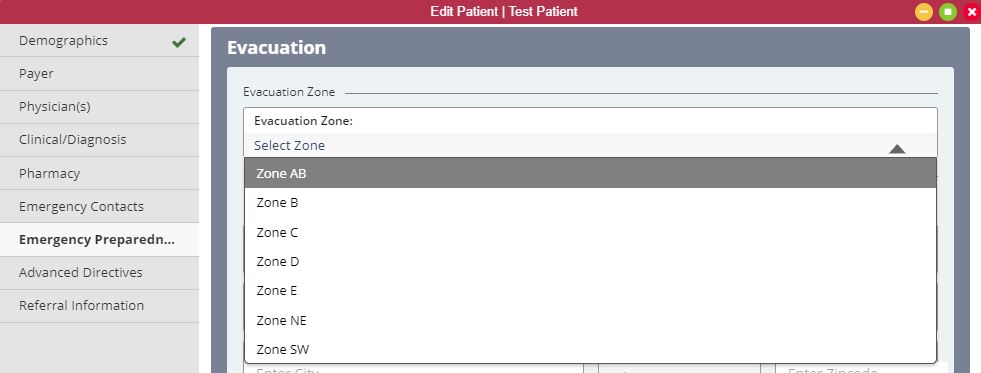
The evacuation zones added in Company Setup will appear in the Evacuation Zone drop-down menu on the Emergency Preparedness tab of patient profiles. Users can access this section by selecting Edit in a patient’s chart and navigating to the Emergency Preparedness tab.
To document evacuation zones from a patient’s chart:
Patients tab ➜ Patient Charts ➜ Edit ➜ Emergency Preparedness tab ➜ Evacuation section ➜ Evacuation Zone

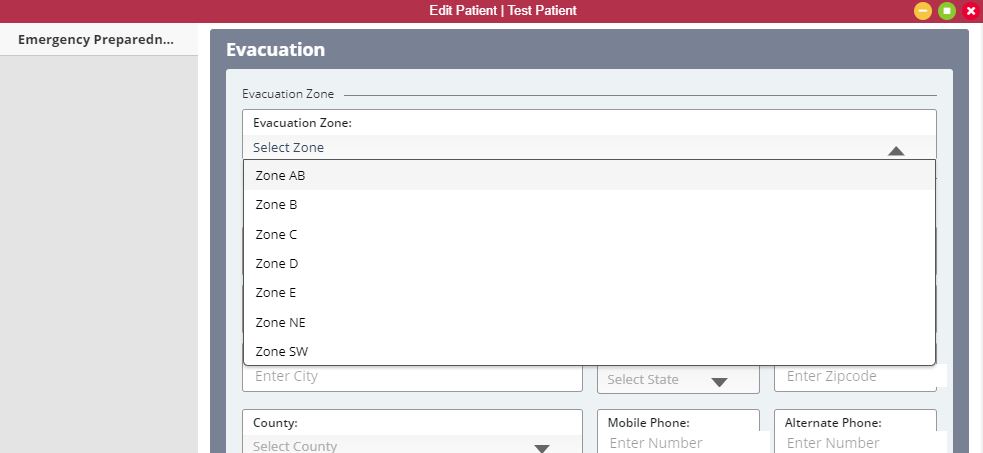
Users can also access this section by navigating to the Risk Assessment tab in an OASIS and selecting the Emergency Preparedness button under Hospitalization Risk Assessment Tools and Emergency Preparedness.
To document evacuation zones from an OASIS:
OASIS ➜ Risk Assessment tab ➜ Hospitalization Risk Assessment Tools and Emergency Preparedness ➜ Emergency Preparedness button ➜ Evacuation section ➜ Evacuation Zone

Updated on 10/01/2020