Organizations in Kansas will soon have access to the AuthentiCare EVV integration. To prepare for the integration, organizations must add AuthentiCare as an EVV aggregator in Company Setup and enter the appropriate EVV procedure code for applicable tasks.
Note: Provider organizations must enter their employee information, including the employee social security number, into AuthentiCare prior to submitting visits for that employee to the AuthentiCare aggregator. Visit the AuthentiCare website for more information about using an alternative EVV Vendor and creating employee profiles within AuthentiCare.
To prepare for the AuthentiCare integration, add AuthentiCare as an EVV aggregator in Company Setup:
Select Company Setup under the Admin tab.
Navigate to the Electronic Visit Verification tab using the menu on the left side of the screen.
Click +Add Provider.
Select AuthentiCare from the Provider drop-down menu.
Select the applicable branches, state and payment sources.
Click Save.
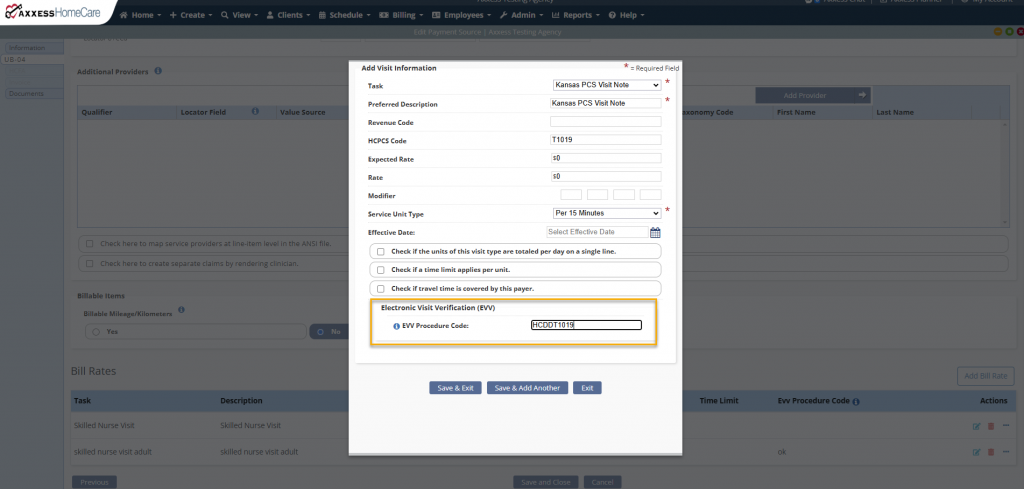
Once this information in Company Setup is saved, navigate to the applicable payment sources and enter the EVV Procedure Code for each associated task utilizing the AuthentiCare Service Codes and Activity Codes list.
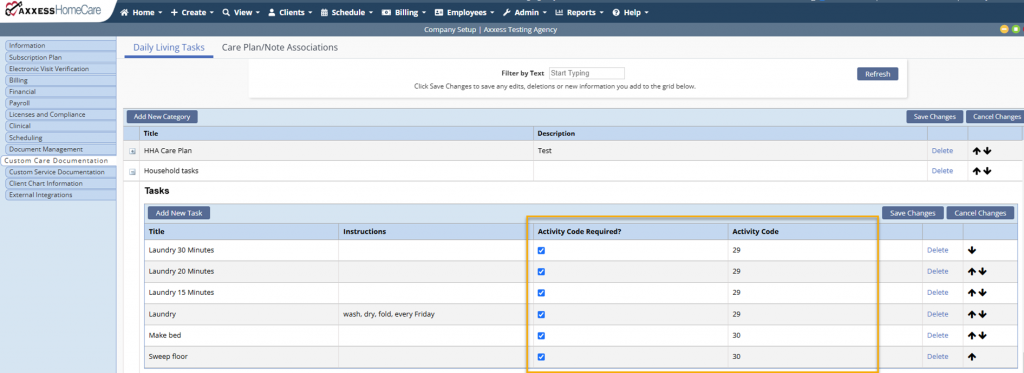
For service codes that require an activity code, follow the steps below:
Select Company Setup under the Admin tab.
Navigate to the Custom Care Documentation tab using the menu on the left side of the screen.
Click the + sign next to any existing tasks with applicable activity codes.
Check the Activity Code Required box.
Select the appropriate activity code from the list.
Click Save Changes.
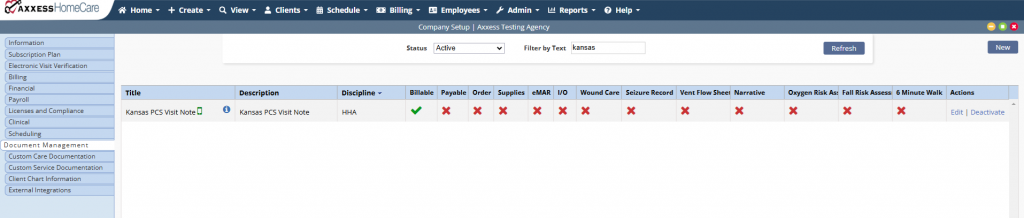
Note: To ensure that activity codes are properly applied in the EVV record, organizations must add a task to the payment source that is associated with the Custom Visit Note for the HHA discipline. To add a task, navigate to Company Setup and select the Document Management tab. Select New at the top of the screen.
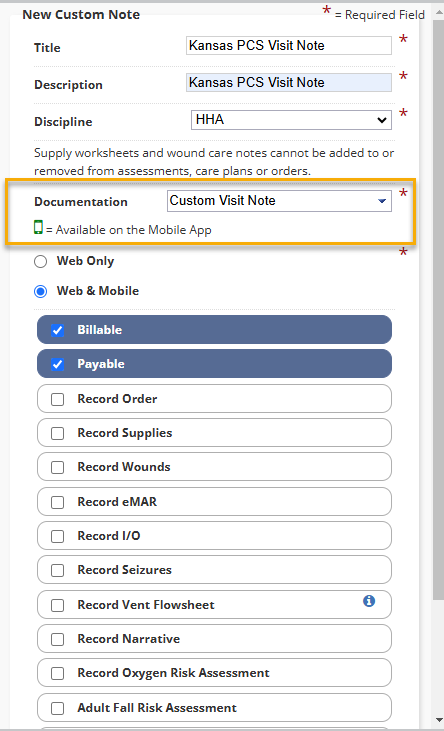
On the New Custom Note screen, complete the required fields, selecting HHA from the drop-down in the Discipline field and Custom Visit Note in the Documentation field. Select Web & Mobile and check the boxes next to Billable and Payable. Click Save to complete.
If a new task is not needed, ensure that the task configured to the payment source is the one specified in the Custom Visit Note, as indicated on the blue information tooltip.