Axxess Palliative Care now enables users to generate private pay invoices when patients do not have a traditional payer source. This enhancement streamlines billing operations for organizations with patients who have alternative payment sources.
To generate private pay invoices, users must have permission to view, add and edit insurance/payer and authorizations and permission to view and edit the patient chart and statements in Axxess Palliative Care.
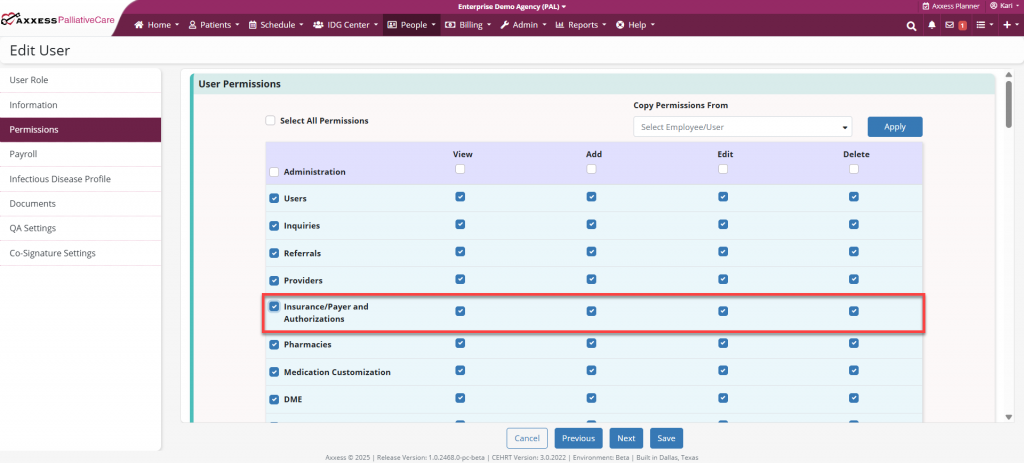
To give a user permission to view, add and edit insurance/payers and authorizations, edit the user’s profile and navigate to the Permissions tab. In the Administration section, select View, Add and Edit next to the Insurance/Payer and Authorizations permission.
People tab ➜ People Center ➜ Edit ➜ Permissions tab ➜ Administration section ➜ Insurance/Payer and Authorizations ➜ View/Add/Edit
To give a user permission to view and edit the patient chart, navigate to the Clinical section and select View and Edit next to the Patient Chart permission.
People tab ➜ People Center ➜ Edit ➜ Permissions tab ➜ Clinical section ➜ Patient Chart ➜ View/Edit

To give a user permission to view and edit statements, navigate to the Billing section and select View and Edit next to the Statements permission.
People tab ➜ People Center ➜ Edit ➜ Permissions tab ➜ Billing section ➜ Statements ➜ View/Edit

Click Save to finish granting the permissions to the user.
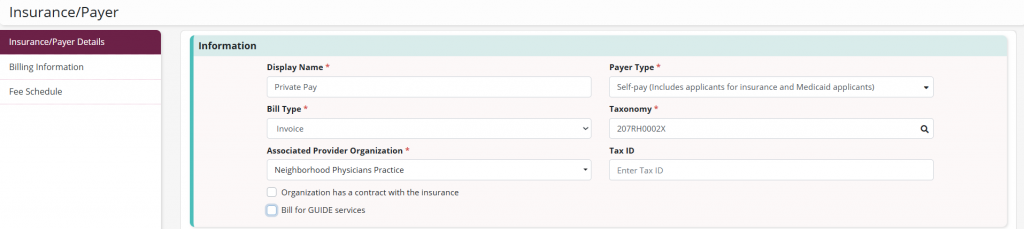
To create an invoice payer type, navigate to the three-line or plus menu and select Insurance/Payer from the drop-down menu. On the Insurance/Payer Details section, enter the Display Name, select Self-pay from the Payer Type drop-down list, select Invoice from the Bill Type drop-down list, then select the Associated Provider Organization and enter the Taxonomy code.
To review or update the remit address associated with the patient’s provider organization, select the Add/Edit Remit Address button.

On the Billing Information tab, the Enforce Patient Responsibility and Disable ERA payer setting are preselected. Select the checkbox next to Payer Requires Authorization for Provided Services to require authorization.

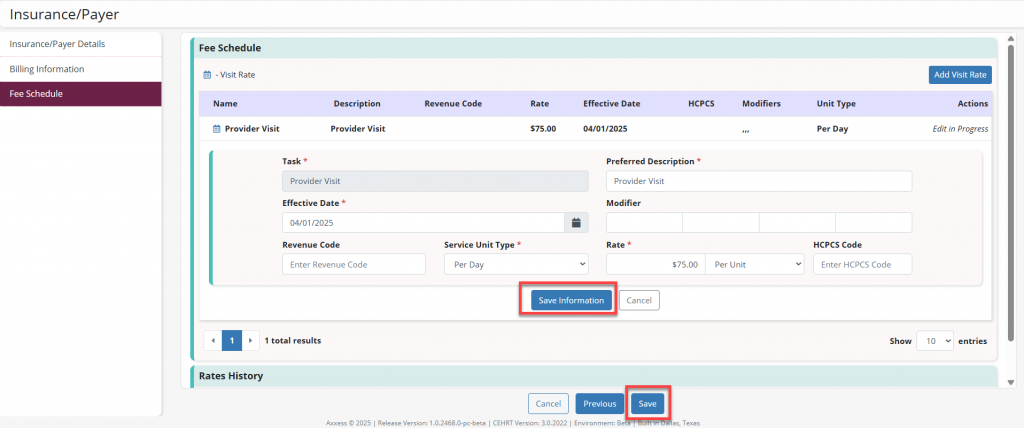
On the Fee Schedule tab, select Add Visit Rate for each visit task you intend to bill for. On the Add Visit Information screen, enter the required information. Once all the necessary information is entered, select Save Information to save it to the fee schedule and select Save at the bottom of the screen to save the payer.
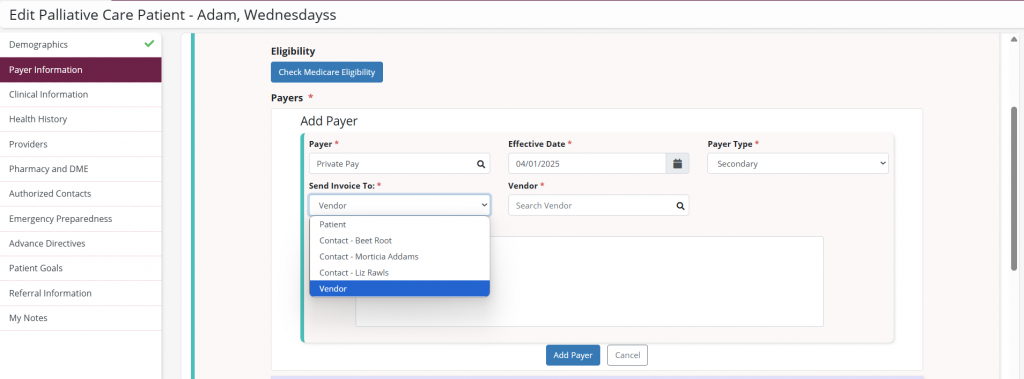
To add an invoice payer to a patient’s profile, navigate to the desired patient’s chart and select Edit Profile, on the Payer Information tab, select Add Payer. Use the search bar in the Payer field to search for the payer, enter the Effective Date and select the Payer Type (Primary, Secondary or Tertiary).
In the Send Invoice To field, users can elect to send the invoice to a Patient, Contact or Vendor. If the invoice payer is the primary payer, the contact and vendor name and address will be displayed. If the invoice payer is secondary or tertiary, the patient’s name and address will be displayed. If vendor is selected, an additional field will populate to select the desired vendor, and the name and address will be displayed on the patient statement.
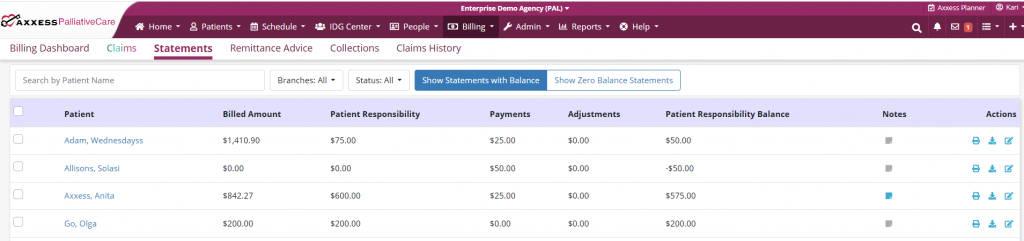
Once an invoice payer with a fee schedule is created, the payer is selected as a primary, secondary or tertiary payer in the patient profile and a billable visit is completed where the invoice payer is the selected payer, then a patient statement will be generated. To view a patient statement, navigate to the Billing Dashboard under the Billing tab and select Statements. Using the Show Statements with Balance toggle, locate the desired patient. Statements can be downloaded, printed and edited using the icons under the Actions column.
Updated on 04/23/2025