Axxess Palliative Care now enables users to combine tasks into schedule sets for easy scheduling. Once created, these schedule sets can be assigned to patients, simplifying the scheduling process and enhancing efficiency in patient care management.
To create and manage schedule sets, users must have permission to view patient charts, view/add/edit/delete schedule sets, view patient schedules and add visits in Axxess Palliative Care.
To create or manage schedule sets, navigate to the three-line menu in the top-right corner of the screen and select Schedule Sets.
 ➜ Schedule Sets
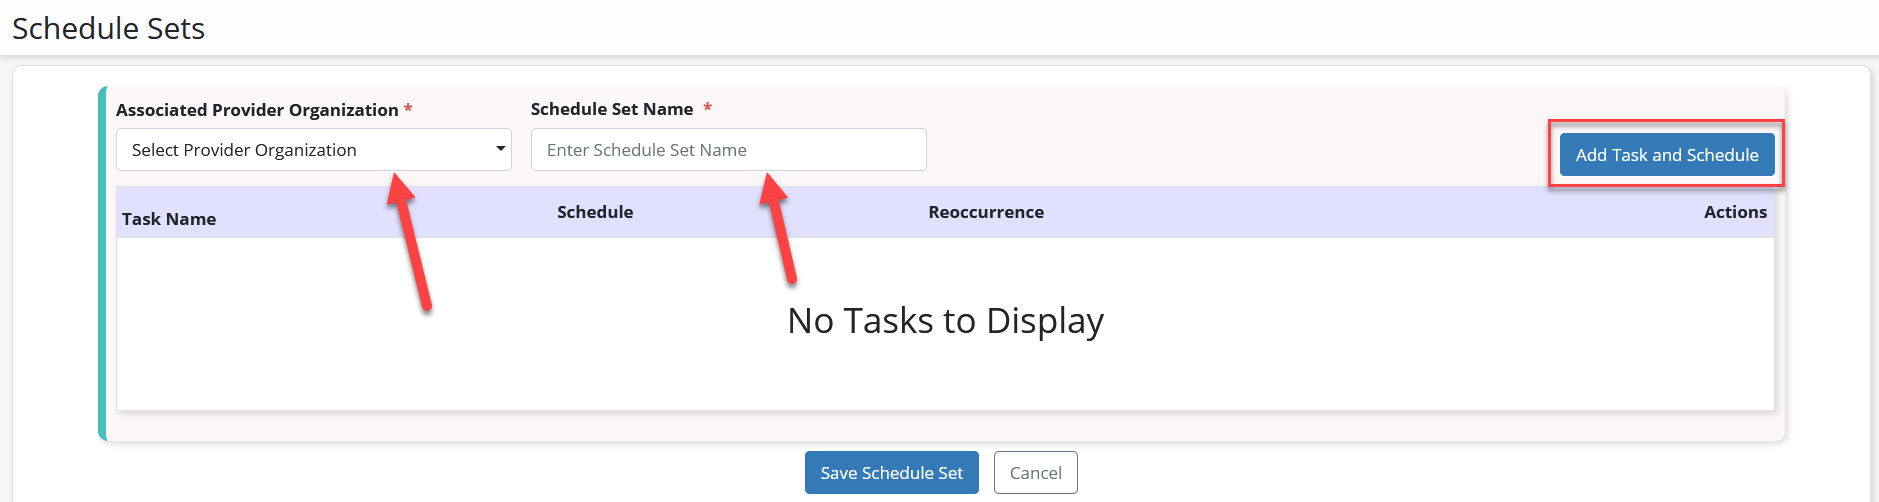
On the Schedule Sets screen, click Add Schedule Set to create a new schedule set.

Select the appropriate provider organization and enter a name for the schedule set in the fields at the top of the window. Click Add Task and Schedule to assign tasks and frequencies to the schedule set.
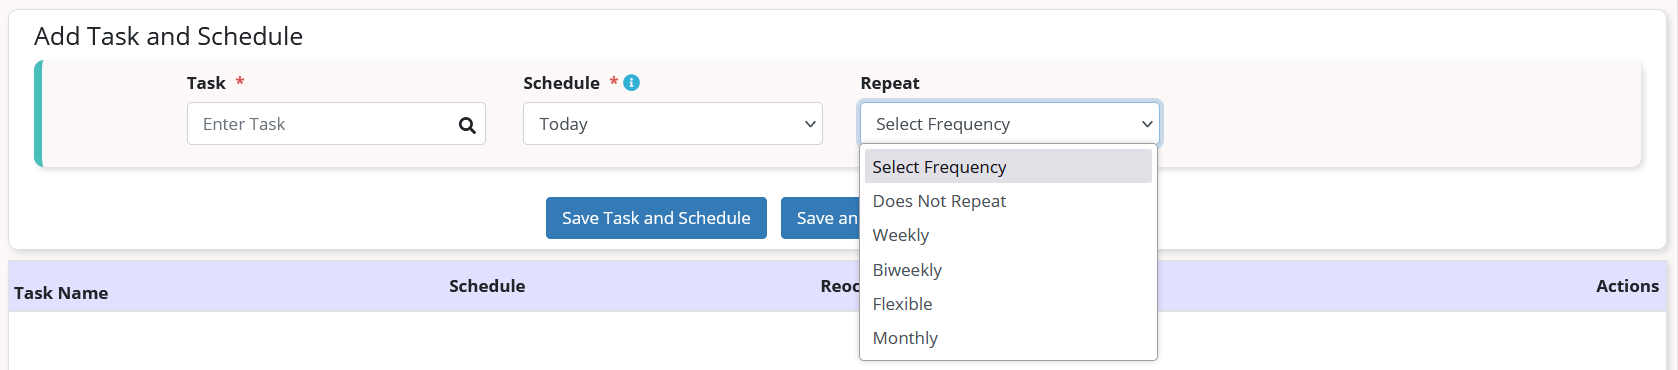
In the Add Task and Schedule window, begin typing a task name in the Task field. The list of tasks will filter to match your search. Select the appropriate task. From the Schedule menu, select Today, Set Number of Days, First Day of the Month or Last Day of the Month.
The option you select from the Schedule menu will determine what additional menus appear:
If Today is selected, a Repeat menu will appear. Select an option from this menu to determine the frequency with which the task should repeat. Selecting these options will ensure the task occurs on the day the schedule set is assigned to the patient and repeats at the selected frequency.
If Set Number of Days is selected, a Number of Days field and Repeat field will appear. In the Number of Days field, enter the number of days from the scheduling date that you want to schedule the task. Select an option from the Repeat field to determine how frequently the task should repeat.

If First Day of the Month or Last Day of the Month is selected, a Recurring checkbox will appear. Check this box to make the task reoccur on the first or last day of each month.


Once the appropriate task and corresponding schedule have been selected, click Save Task and Schedule to save or Save Task and Schedule and Add Another to save and add another task to the schedule set.
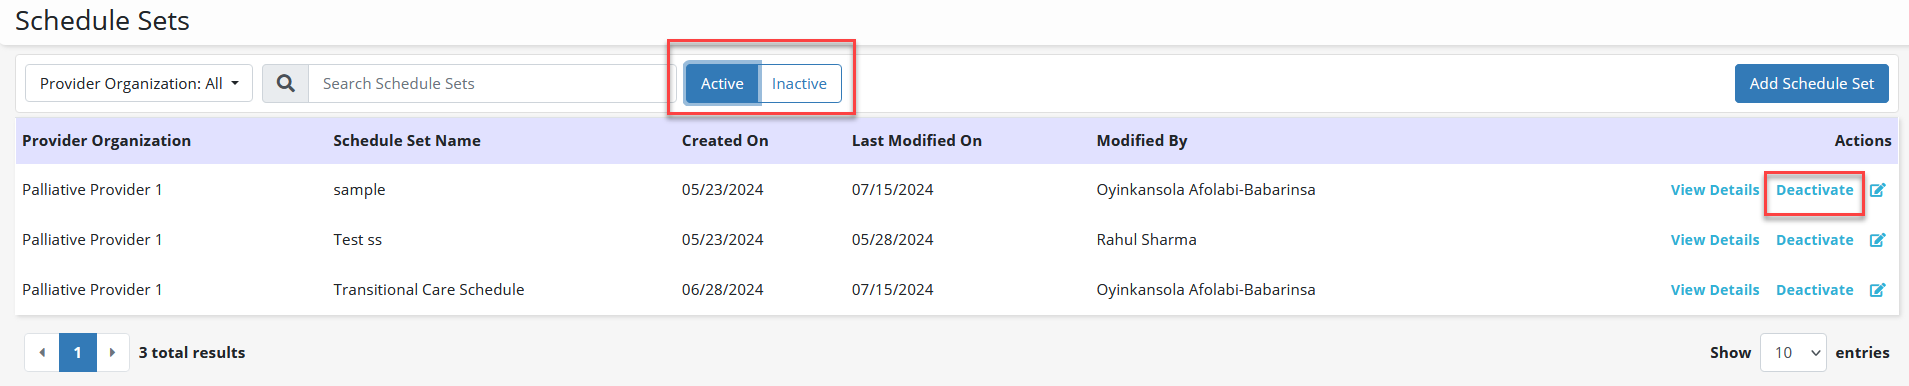
To deactivate a schedule set, select Deactivate under Actions next to the desired schedule set on the Schedule Sets screen. To view deactivated schedule sets, click the Inactive toggle at the top of the screen.
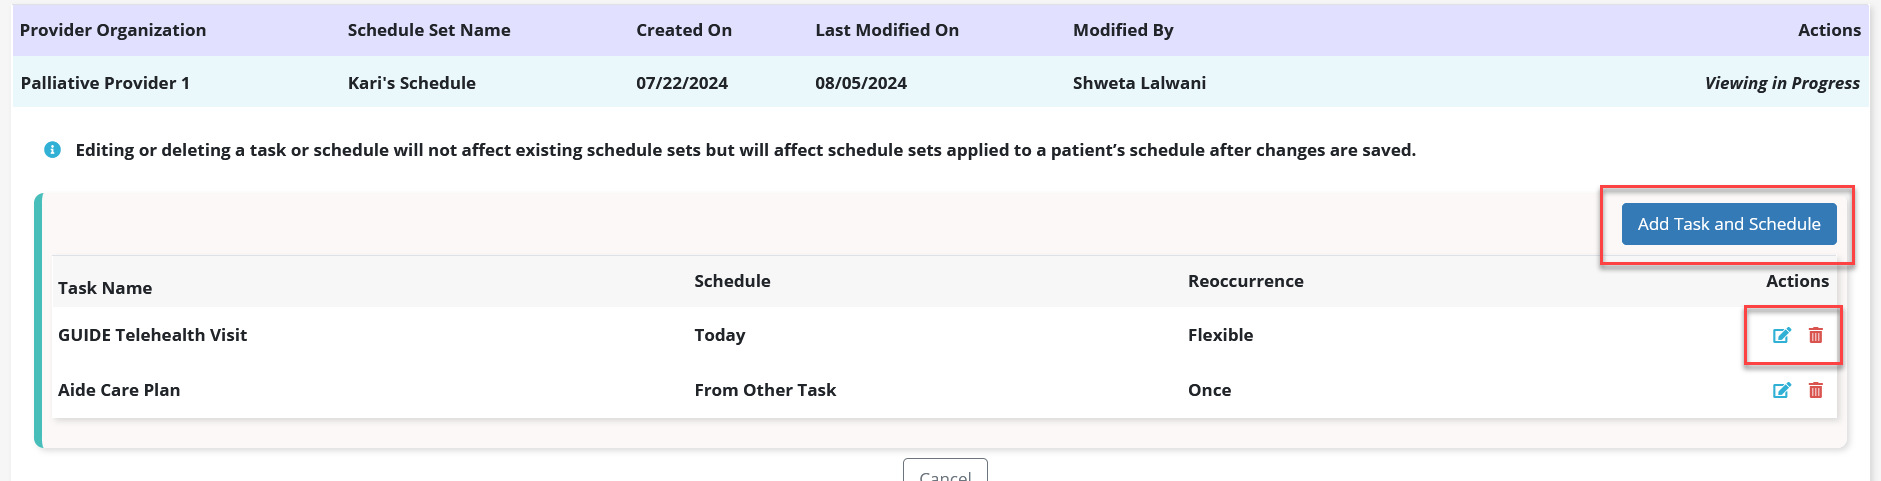
To edit or delete tasks in a schedule set, click View Details under Actions next to the desired schedule set.
Click Add Task and Schedule to add a new task to the schedule set. To edit a task in the schedule set, click the edit icon under Actions next to the desired task. To delete a task in the schedule set, click the delete icon under Actions.
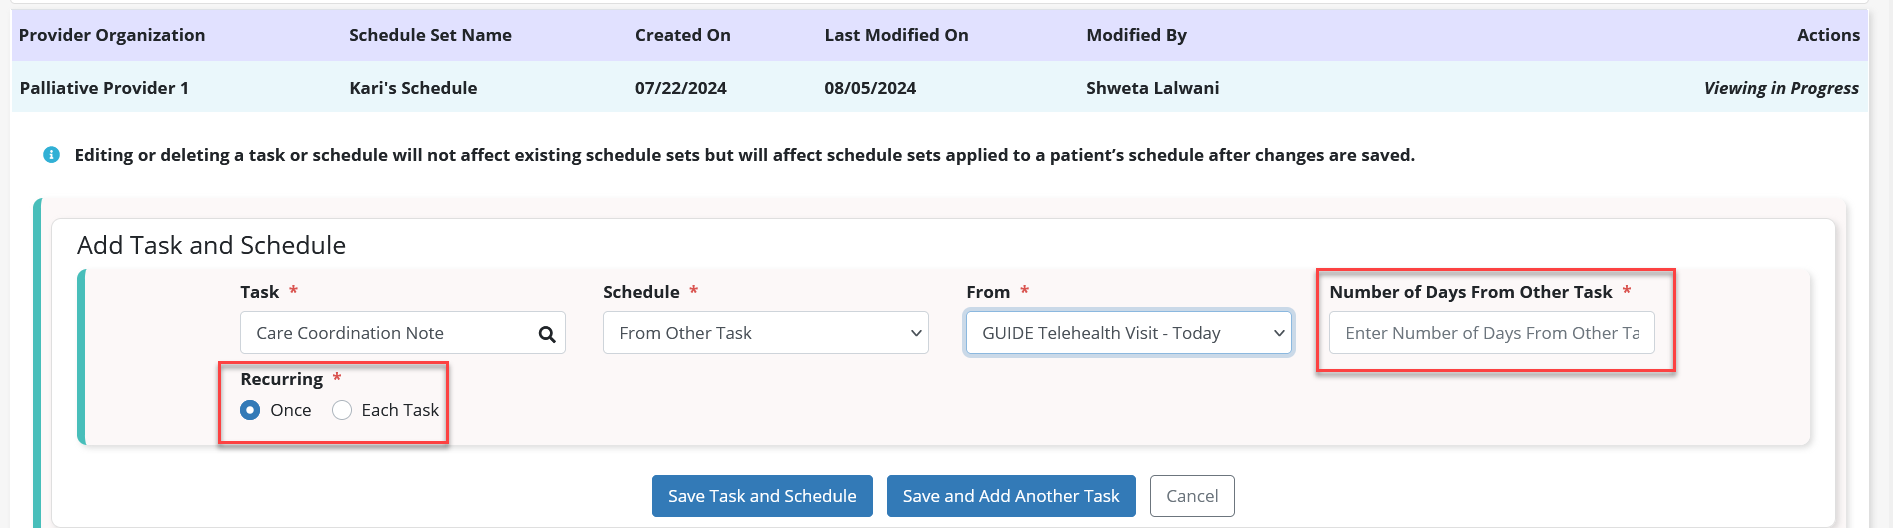
Once at least one task is added to a schedule set, a From Other Task option will appear in the Schedule menu when adding another task.
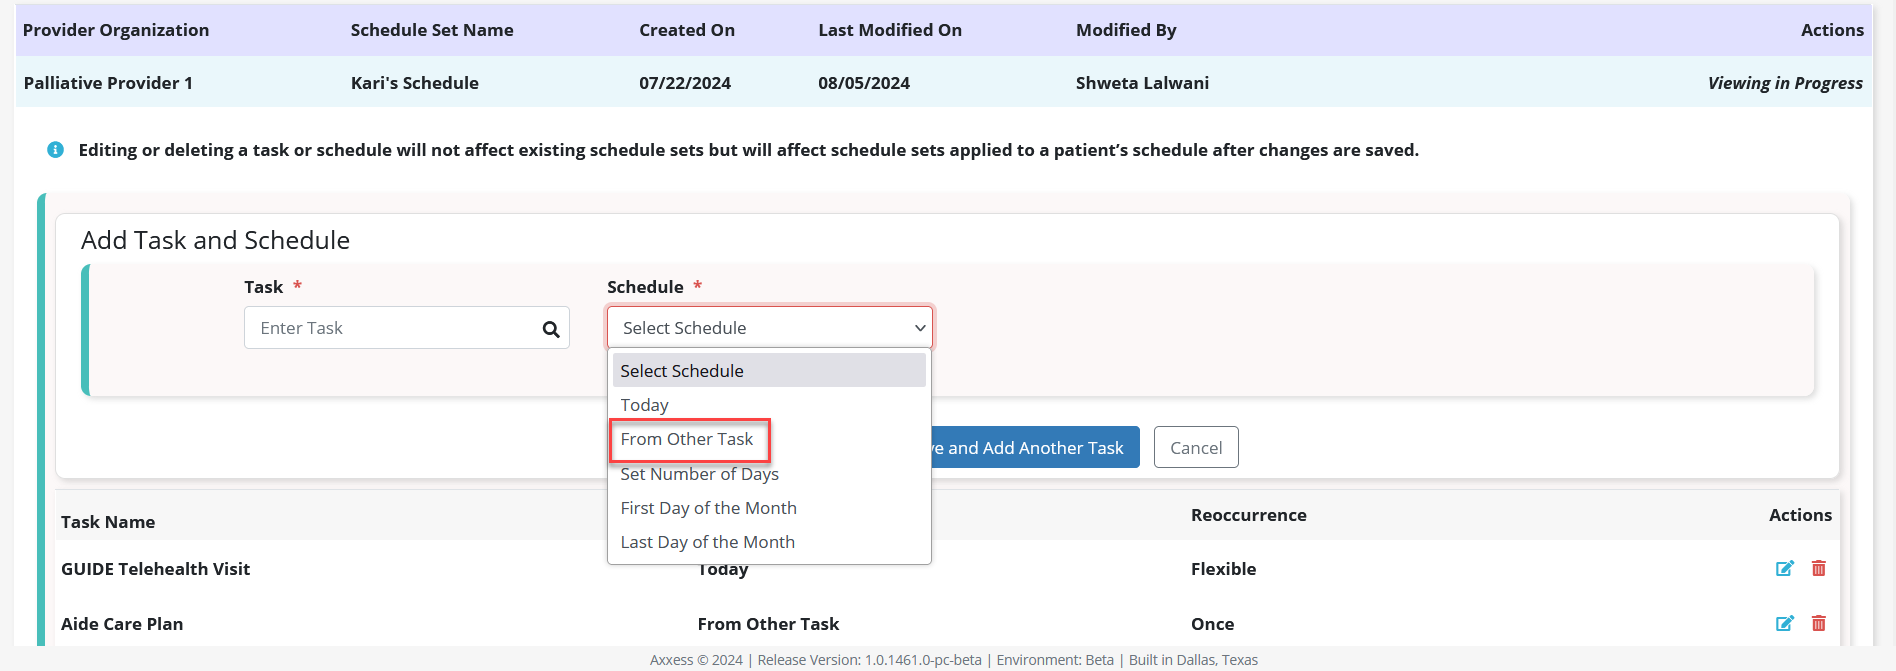
Select this option to schedule the task a certain number days from another task. Once this option is selected from the Schedule menu, select the other task from the From menu and enter the number of days in the Number of Days From Other Task field. If you want the task to occur once, select Once under Recurring. If you want the task to occur each time the other task occurs, select Each Task.
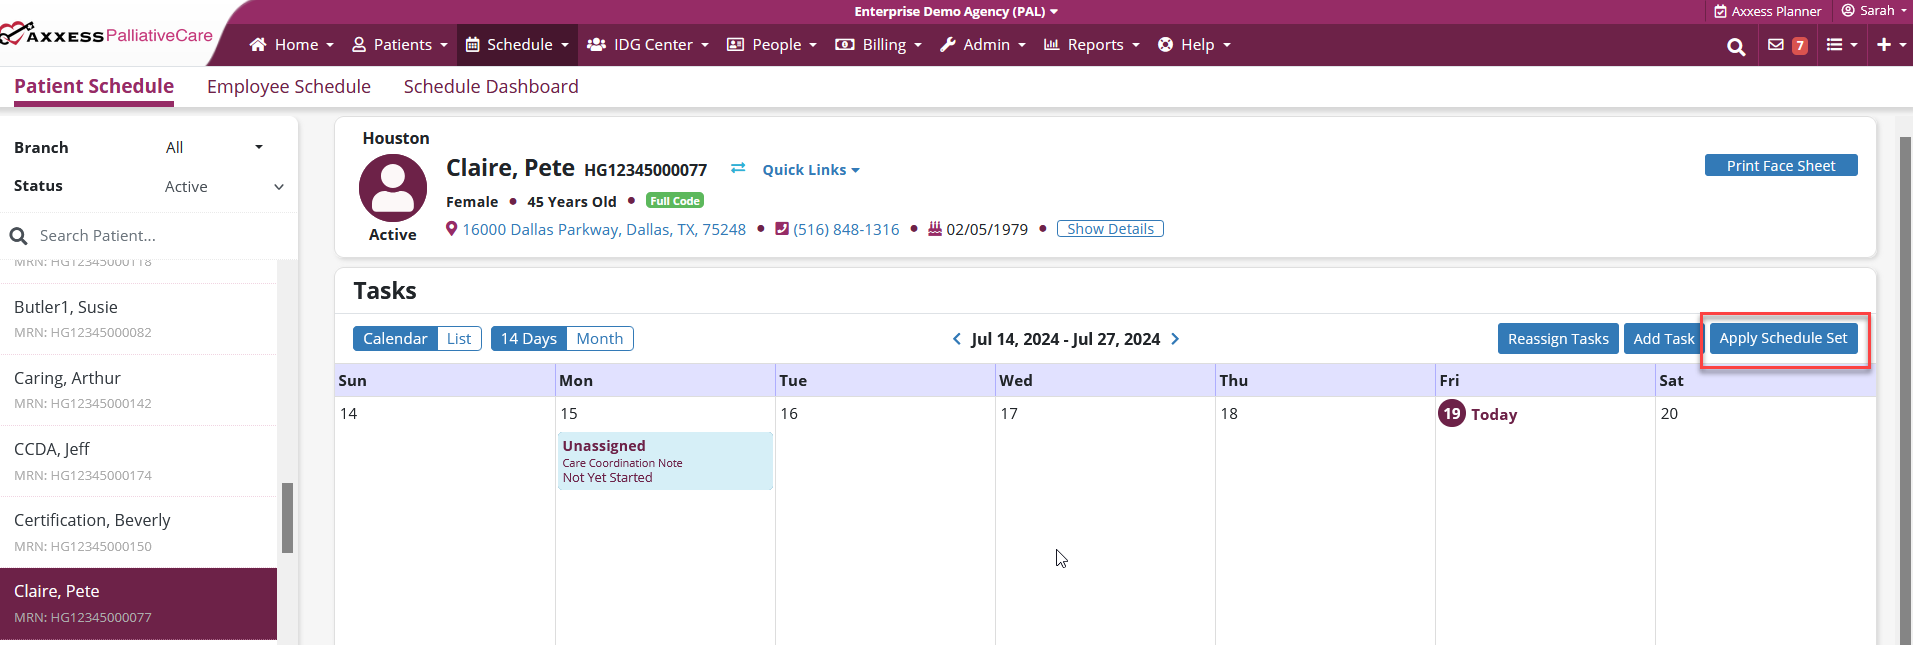
Once a schedule set is established, it can be assigned to patients. To assign a schedule set to a patient, navigate to the Patient Schedule screen under the Schedule tab and locate the desired patient’s schedule. Click Apply Schedule Set on the right side of the patient’s schedule.
Schedule tab ➜ Patient Schedule ➜ Apply Schedule Set
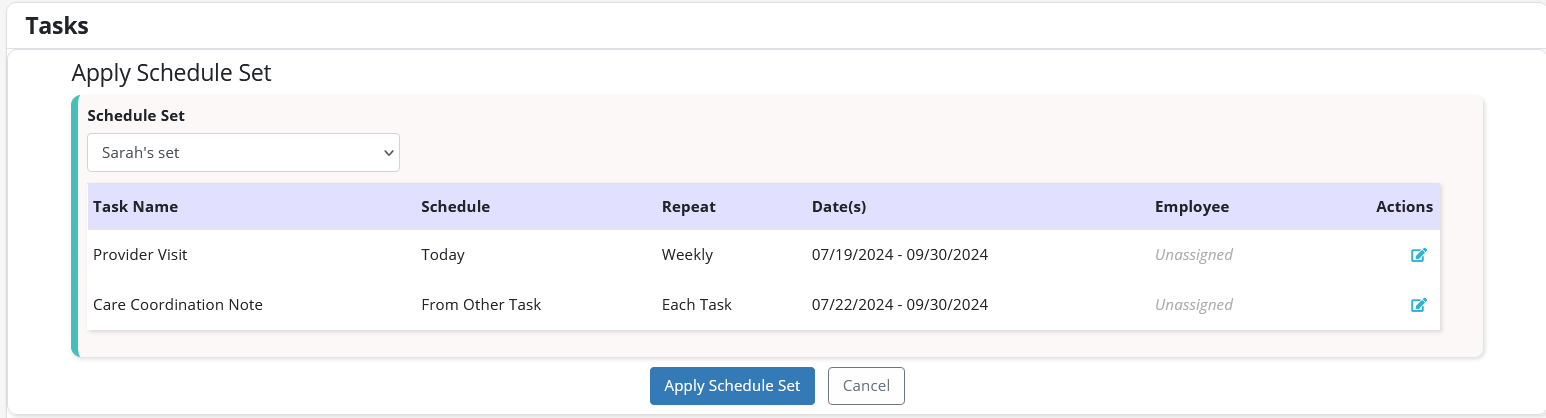
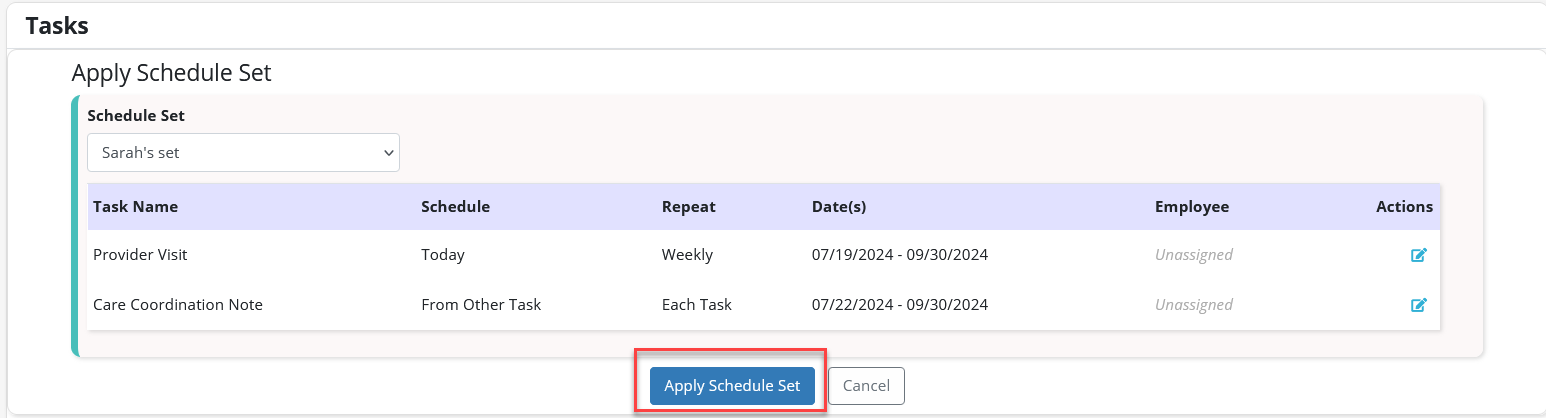
In the Apply Schedule Set window, select the desired schedule set.

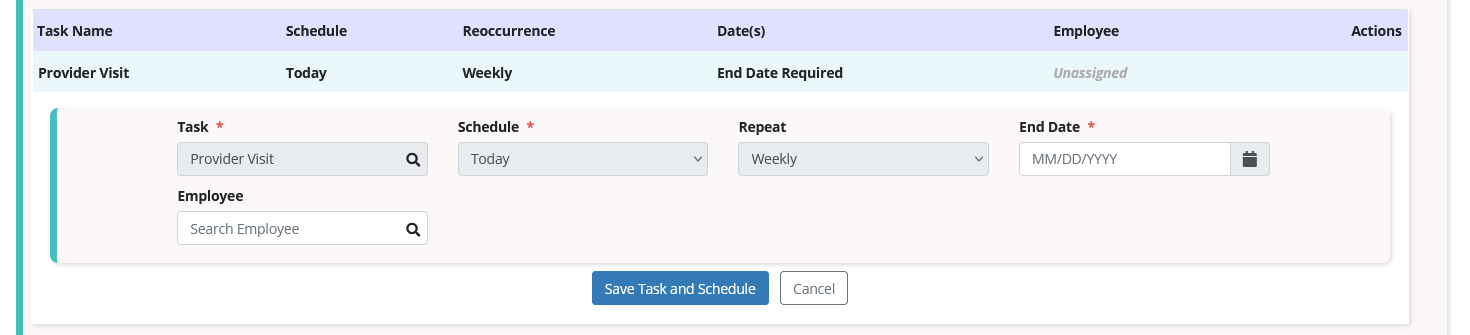
If there are any recurring tasks in the schedule set, an end date must be selected for these tasks. To select an end date for a recurring task, click the edit icon under Actions.
Enter an end date in the End Date field. To assign the task to an employee, select an employee from the Employee menu. Selecting an employee is not required. Click Save Task and Schedule to save the end date (and employee, if selected).
Once the appropriate schedule set is selected and end dates are entered for recurring tasks, click Apply Schedule Set to finish applying the schedule set to the patient’s schedule. Once this is selected, the tasks in the schedule set will be plotted on the patient’s calendar.
Updated on 08/21/2024