Under the Claims tab you can view all claims submitted by your organization. The claim list is auto created directly from data retrieved from the direct data entry system (DDE). To access claim history, navigate to the Claims tab and select History.
To begin the claims entry process, navigate to the General tab and select the desired bill type under Bill Type. Enter the desired time frame under Statement Covers Period. Then navigate to Patients tab and enter the patient’s name, Medicare Insurance Number (MBI), date of birth, gender and address.
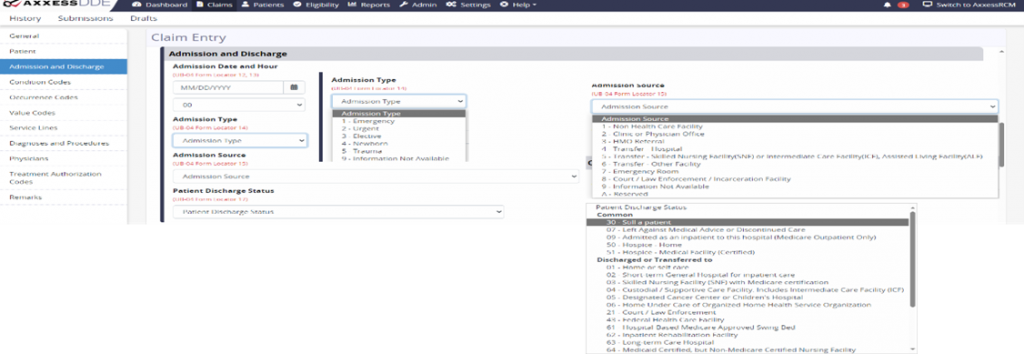
Once entered, navigate to the Admission and Discharge tab and enter the Admission Date and Hour. Select the Admission Type, Admission Source and Patient Discharge Status.
Once selected, navigate to the Occurrence Codes tab and enter the desired occurrence in the Occurrence field.

Select the Value Codes tab and enter the value codes.

Under the Service Lines tab and enter the OASIS-generated HIPPS code in the Revenue Code field. Click the Add Service Line button as needed for additional lines of service. In the respective fields enter the Revenue Code, HCPCS Code, a Modifier if the NOA was late, the Service Date, the Total Units, the Covered Units and the Total Charges. Non-Covered Charges should remain at 0. Enter the Facility NPI if the patient is being seen at a facility.

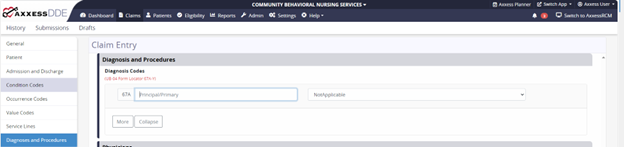
Under the Diagnosis Codes tab and enter the Primary Code, select More at the bottom of the section to add additional codes.
Navigate to the Physicians tab and select Add. Once selected, enter the physician’s NPI and their first and last name.

Under the Treatment Authorization Codes tab, enter the UTN (Unique Treatment Number) in the field labeled Field 2. This number is assigned by Medicare if located in a RCD state.

Under the Remarks tab, the user can enter any remarks to support why a KX modifier was added to the Service Lines section.