Axxess Hospice now enables users to manually link a remittance to eligible claims when the claim and remittance payer do not match. This functionality helps organizations maintain accurate payment posting and reporting visibility across payer relationships.
To link claims to a remittance, navigate to Remittances under the Billing tab. Locate the remittance to which you want to link claims and select View.
Billing tab ➜ Remittances ➜ View
On the Remittance Details screen, select Link Claims.
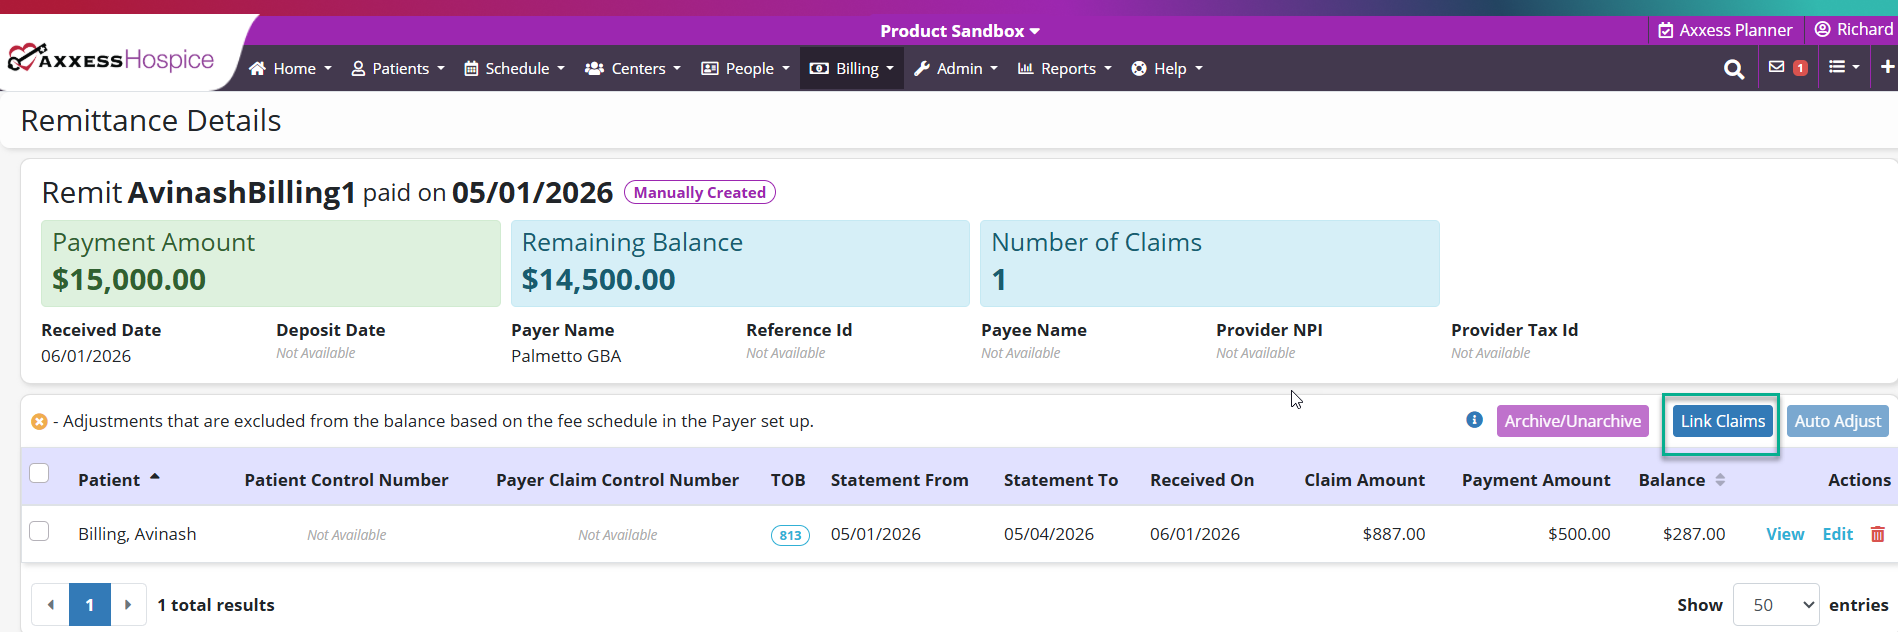
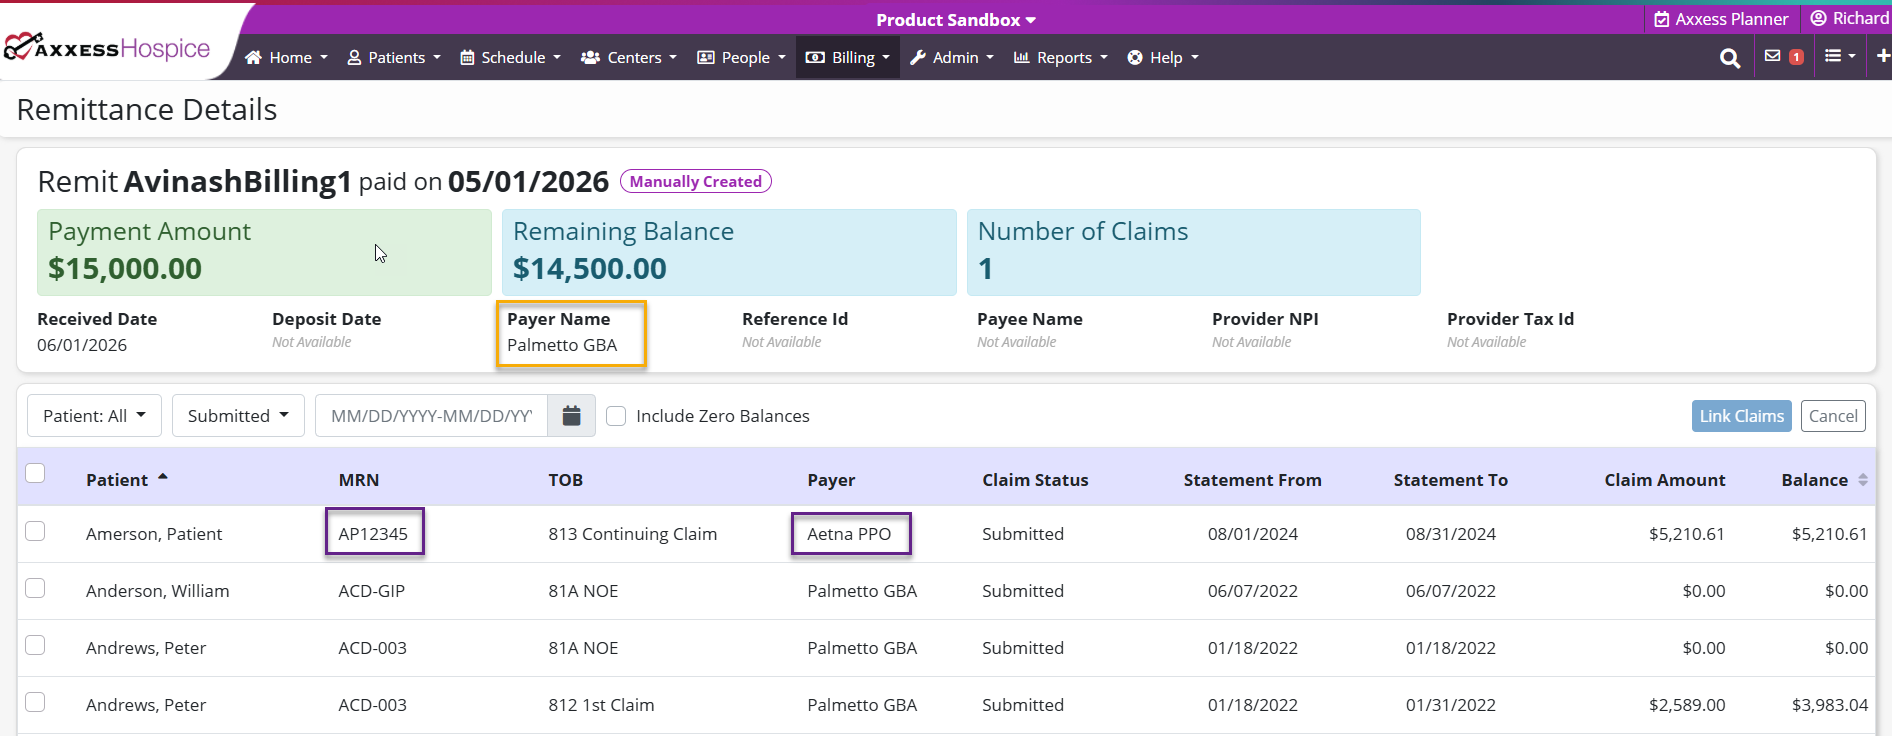
The system will display the patient’s MRN and claims associated with payers other than the payer on the remittance. Select the appropriate claim(s) to link to the remittance.
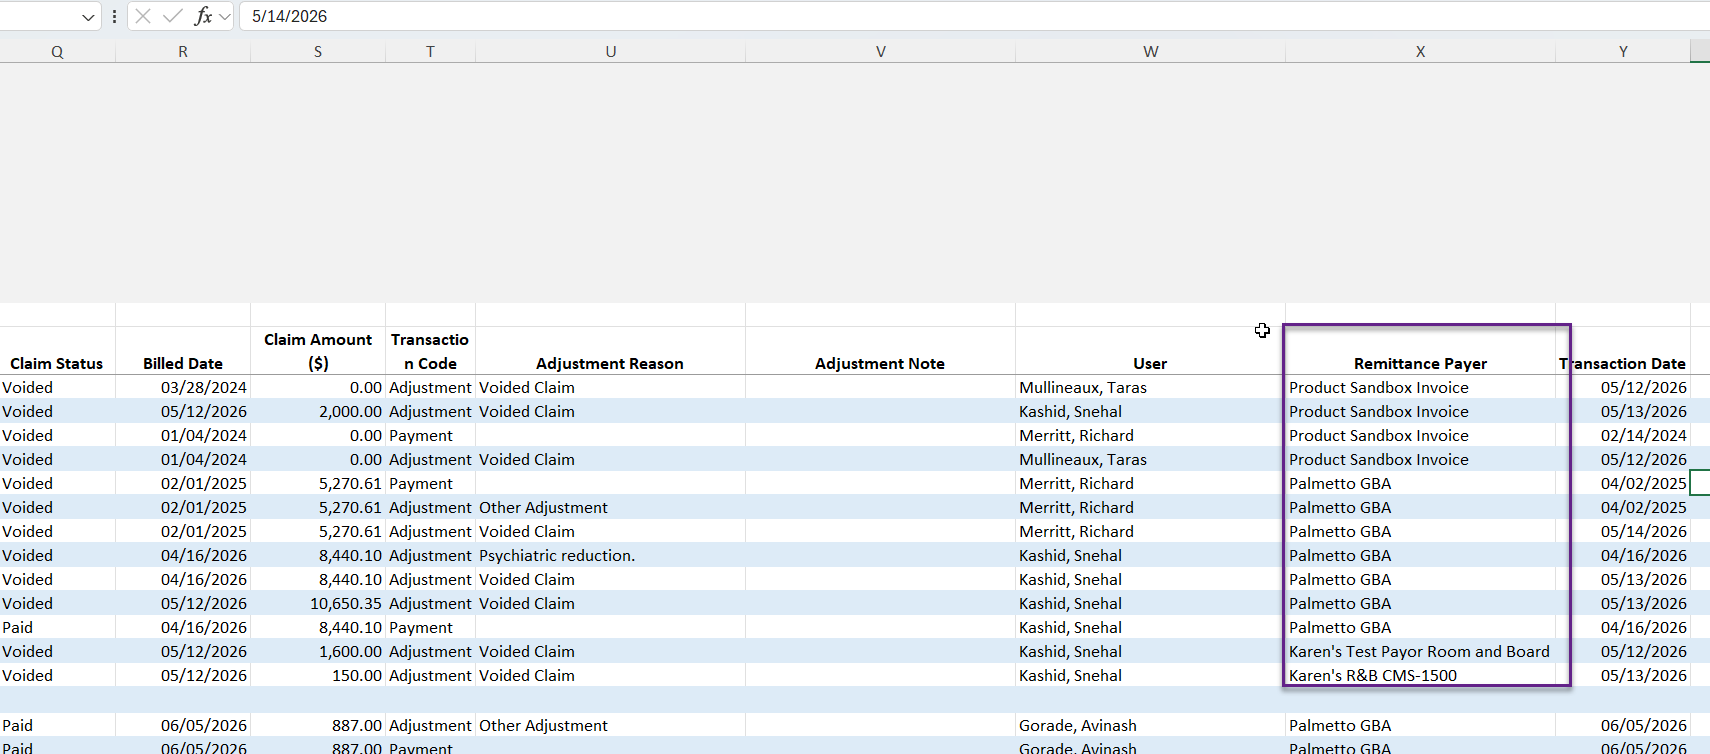
The Payment and Adjustment Activity Report now includes a new column: Remittance Payer.
To view this report, navigate to Report Center under the Reports tab. In the Billing and Financial Reports section, select the Payment and Adjustment Activity Report. Enter your desired filtering criteria and click Export to export the report to Excel.
Reports tab ➜ Report Center ➜ Billing and Financial Reports section ➜ Payment and Adjustment Activity Report
Updated on 7/16/2026
No related posts.